

Overview
Create an engaging Story widget with ReelPik to showcase multiple groups of shoppable videos on your storefront.
The Story widget allows you to create multiple Stories. Each Story is displayed as a separate circle on your storefront, and each circle can contain multiple videos.
This makes the Story widget a great way to organize your videos into different topics, products, collections, or content themes.
How to set up a Story widget?
Step 1: Create a Story widget
-
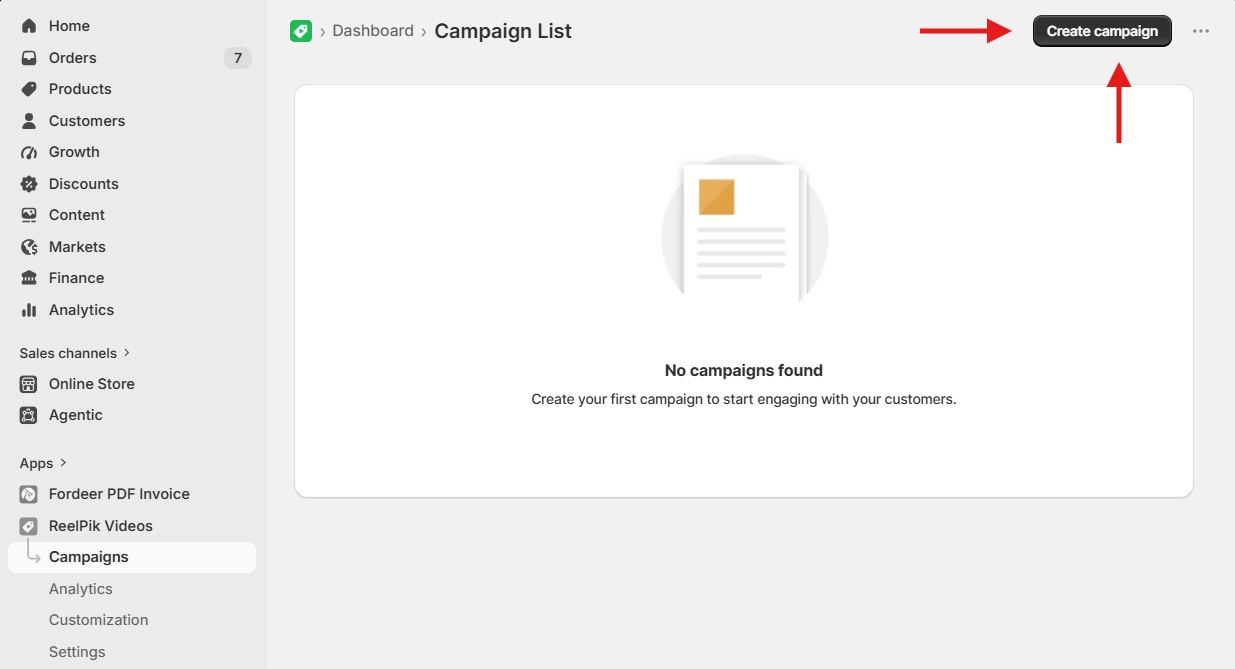
Go to ReelPik Videos → Campaigns.
-
Click Create Campaign.
-
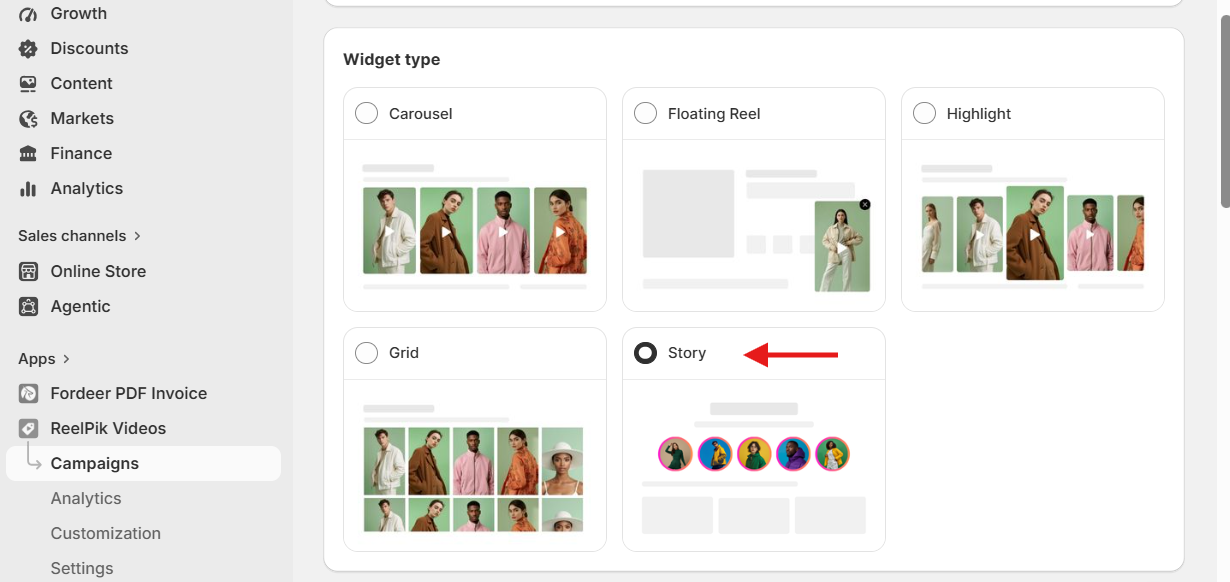
Select Story as the campaign type.
-
Click Create Story.
Step 2: Add multiple Story circles
After creating the campaign, you will see the Stories section.
To create multiple Stories:
-
Click Add a new story.
-
Enter a name for your Story.
-
Repeat the process to create as many Stories as you need.
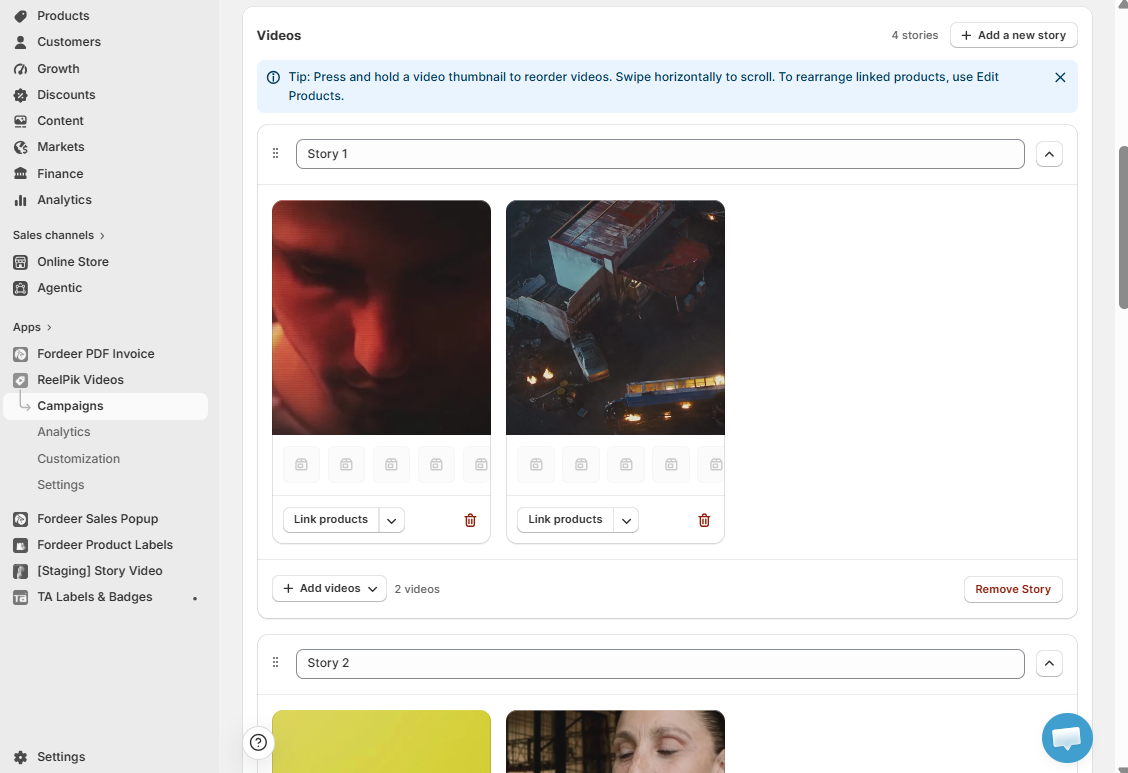
For example, if you create:
-
Story 1: for Features
-
Story 2: for Feedback
-
Story 3: for Discount
Your storefront will display 3 Story circles.
Tip: Use clear and descriptive Story names to help you organize your content.
Step 3: Add videos to each Story
Each Story can contain multiple videos.
To add videos:
-
Select the Story you want to edit.
-
Click Add videos.
-
Choose your preferred video source.
-
Select or upload the videos you want to add.
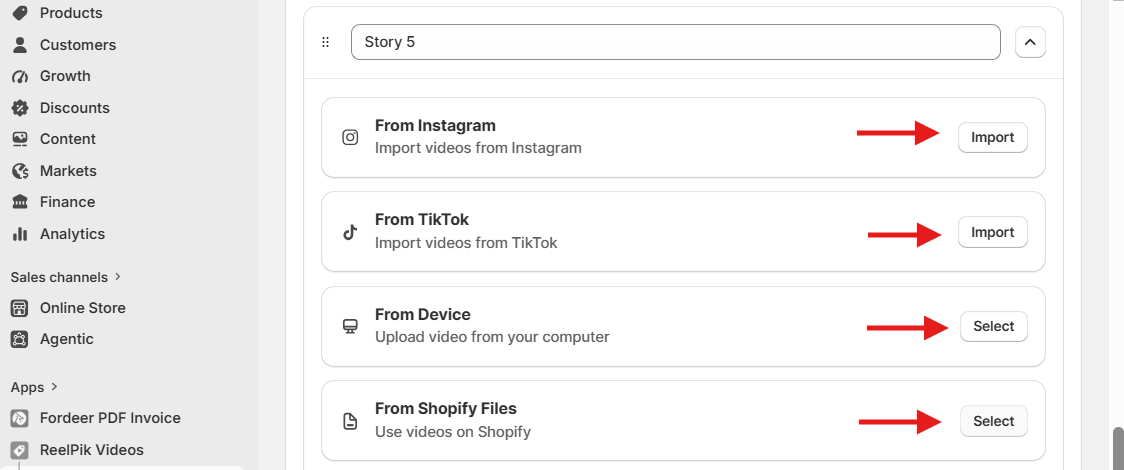
When shoppers click the Story 1 circle on your storefront, they can watch these videos as part of the same Story.
Step 5: Link products to your videos
Make your Story videos shoppable by connecting relevant products.
For each video:
-
Click Link products.
-
Select the products you want to connect to the video.
-
Use Edit Products if you want to view, remove, or rearrange linked products.
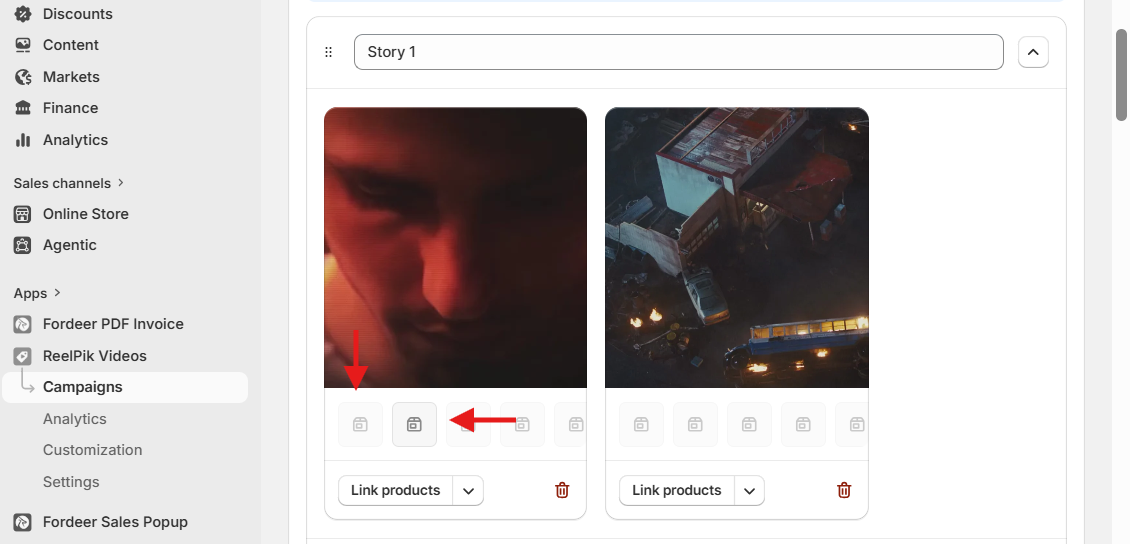
We recommend linking only products that are featured or relevant to the video.
Tip: Each video can have its own product selection, so make sure the products are relevant to the specific video.
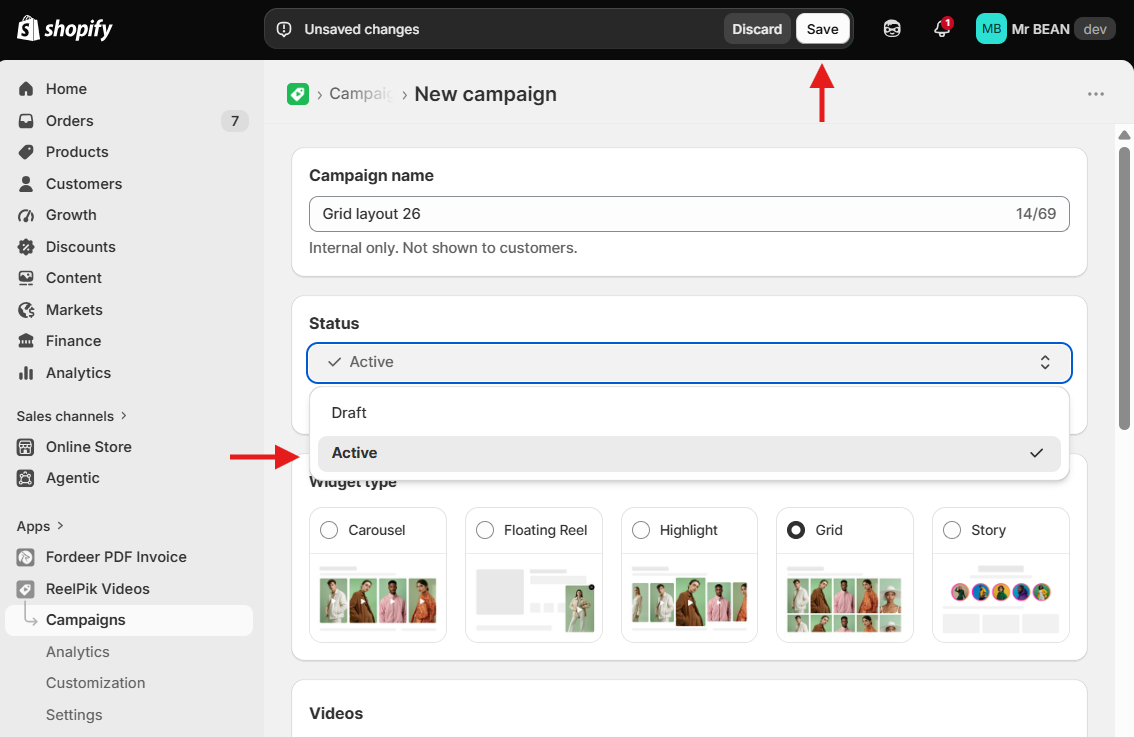
Step 6: Save and activate your campaign
After finishing your Story setup:
-
Review your Stories and videos.
-
Make sure the correct products are linked.
-
Click Save.
-
Activate your campaign.
Step 7: Add the ReelPik app block to your homepage (required step)
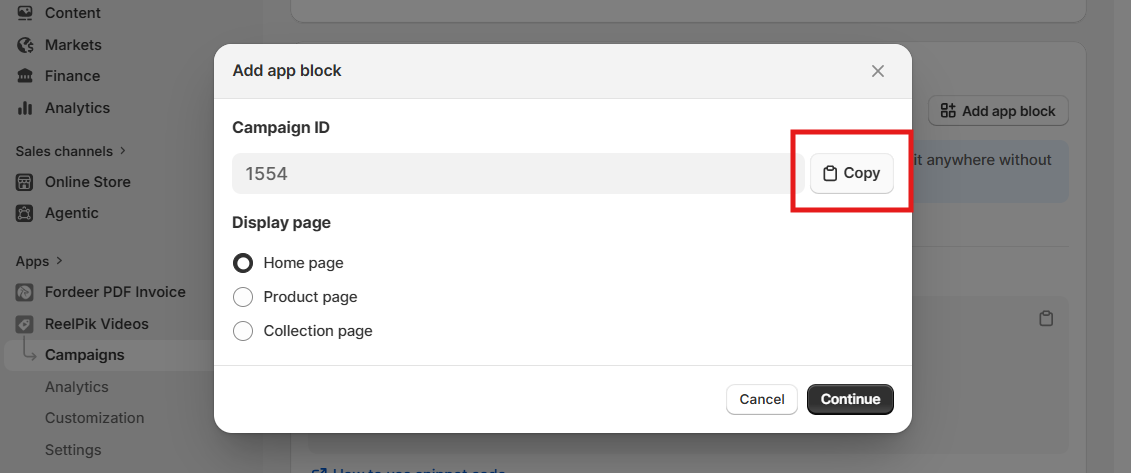
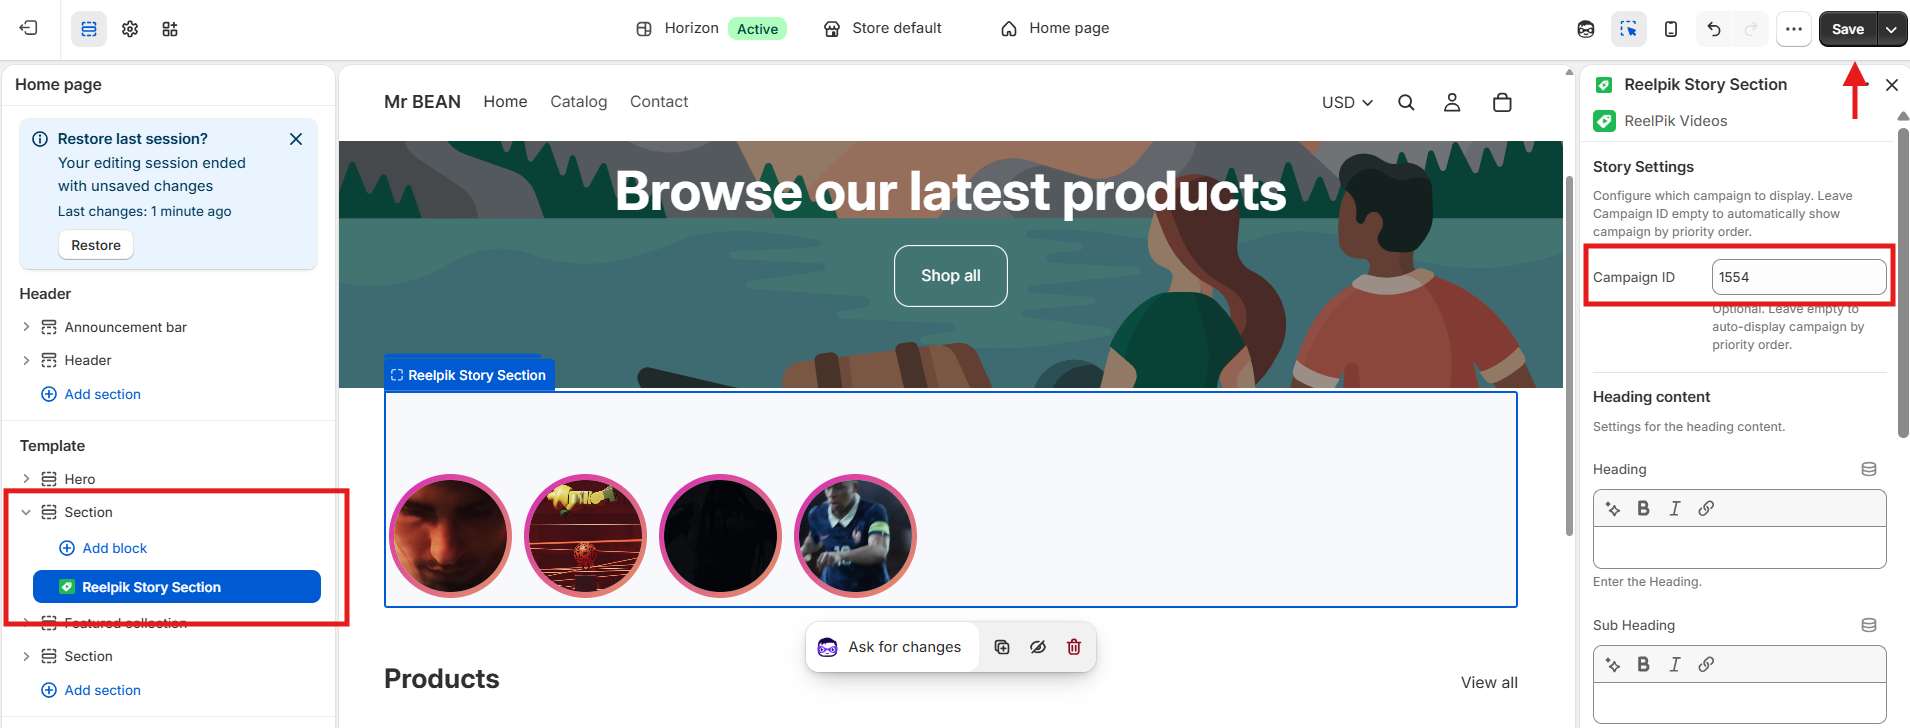
Creating and saving a campaign does not automatically make the video appear on your storefront. You also need to add the ReelPik app block to your homepage.
To add the app block:
-
Go to the Placement section.
-
Click Add app block.
-
Select Homepage from the supported page options.
-
Click Continue.
Best Practices for Story Widgets
1. Create Stories with a clear theme
Group related videos into the same Story.
For example:
-
New Arrivals
-
Best Sellers
-
Summer Collection
-
Customer Reviews
-
Behind the Scenes
This helps shoppers quickly find the content they're interested in.
2. Add multiple videos to each Story
A Story can contain multiple videos, so take advantage of this to provide more content without creating too many Story circles.
3. Keep product links relevant
Make sure the products linked to each video match the products shown or discussed in that video.
4. Don't create unnecessary Stories
Create additional Stories when you have meaningful content to organize.
Too many Story circles can make the widget harder for shoppers to browse.
Important Notes
-
Each Story represents one circle on your storefront.
-
You need to create multiple Stories if you want to display multiple circles.
-
Each Story can contain multiple videos.
-
Videos within the same Story can be reordered.
-
Products can be linked separately to each video.
-
Removing a Story removes that Story from the campaign.
-
You must save and activate your campaign for the Story widget to appear on your storefront.
We value your feedback — it helps us continuously improve ReelPik and provide you with a better experience.
🖥️ Demo store: Check out here with password: 1
👉 Chat with us: Share your feedback directly with our team.
👉 Email us: hi@reelpik.com
👉 Explore more apps: Discover more Fordeer apps.
👉 Join our community: Join ForDeer Community to get the latest updates, tips, and special deals.
🕐 Working hours: 8:30 AM – 5:00 PM (UTC+7), Monday–Friday.
We typically reply to live chats within minutes and emails within a few hours.
Need help? Feel free to reach out anytime via live chat or email!