

Overview
Bring your Instagram content directly to your Shopify storefront with ReelPik Instagram Feed.
With Instagram Feed, you can automatically sync media from Instagram and display it on your store using different widget layouts. You can control which content is synced, how many media items are displayed, how they are sorted, and where the feed appears on your storefront.
How to create an Instagram Feed campaign
Step 1: Select widget type
-
Go to Campaigns → Create Campaign
-
Choose widget type: Instagram Feed
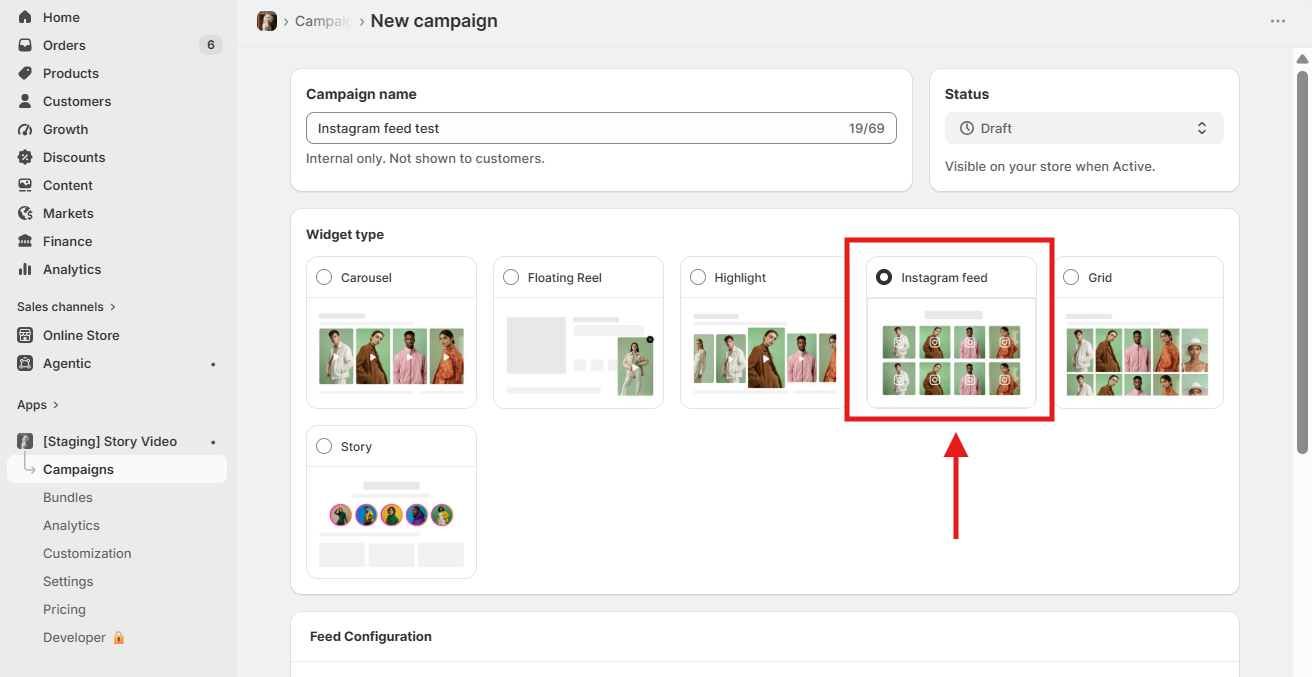
Note: Not available on Legacy plan.
Step 2: Choose your Instagram content source
In the Sync media section, choose the Instagram content you want ReelPik to sync.
Under Source, you can select:
-
User account – Sync media published by a specific Instagram account.
-
Account mention – Sync Instagram content that mentions the selected account.
-
Hashtag – Sync content associated with a specific hashtag.
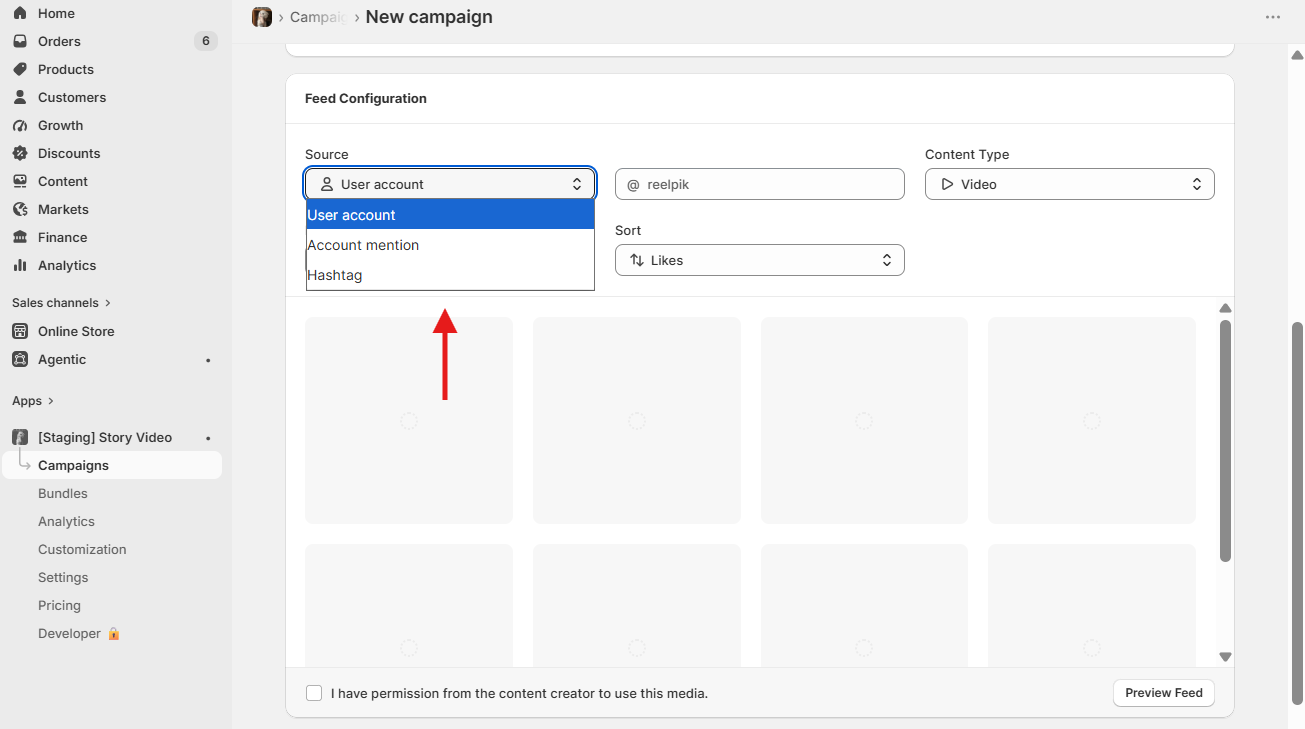
After choosing a source, enter or select the corresponding Instagram account or hashtag.
Tip: Choose the source that best matches the type of Instagram content you want to showcase. For example, User account is suitable for displaying content directly from your brand's Instagram account.
Step 3: Configure your media settings
Next, customize which media ReelPik should sync and display.
Media type
Choose the type of Instagram media you want to include:
-
Video – Sync videos from your Instagram Reels.
-
Image – Sync images from your Instagram Posts.
-
Video & image – Sync both videos and images from your Instagram Posts.
Media limit
Set the maximum number of media items you want to sync for the campaign.
Sort by
Choose how your synced Instagram media should be ordered:
-
Likes
-
Comments
-
Views
-
Date
For example, selecting Likes can help prioritize content with more engagement.
Note: Available sorting options may depend on the selected media type and Instagram data available to ReelPik.
Step 4: Confirm content permission
Before using the synced Instagram media, check: "I have permission from the content creator to use this media."
This confirms that you have permission to display the selected content on your storefront, then click Load media to fetch the content before continuing.
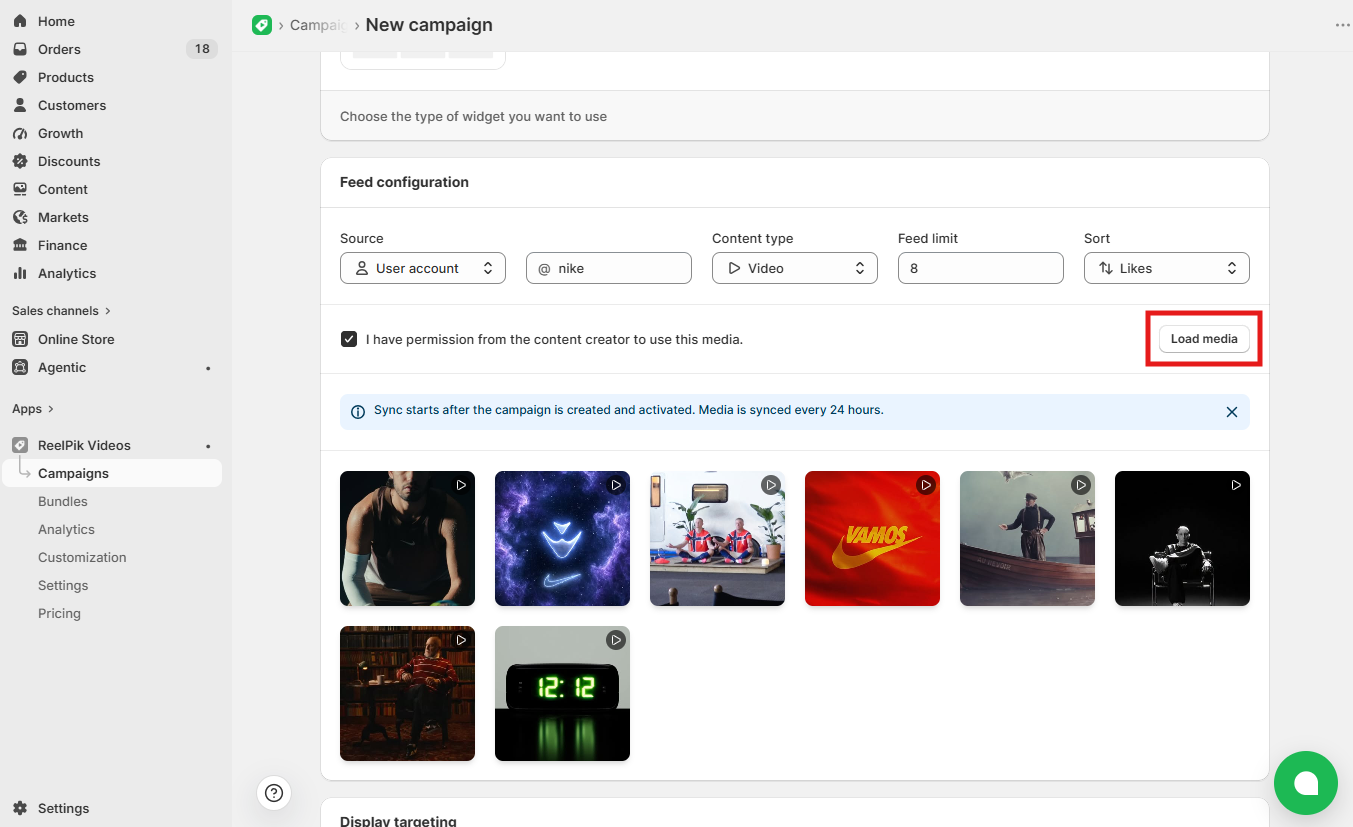
Important: Make sure you have the necessary rights or permission to use content from other creators, especially when syncing content through mentions or hashtags.
Step 5: Save and activate the campaign
Once the campaign is created and activated, ReelPik will begin syncing your Instagram media.
The Sync media section displays information about the synchronization process, including the latest and upcoming sync when available.
Note:
Media syncing starts after the campaign is created and activated.
Instagram media is synced periodically, so newly published content may not appear immediately.
After syncing is complete, review the media displayed in your campaign to make sure the correct content has been imported.
Step 6: Choose where to display your Instagram Feed
Use Display settings to control where the campaign appears on your Shopify store.
This gives you control over which customers and pages will see each Instagram Feed campaign.
Tip: If you're creating a general brand Instagram feed, the Home page is a good place to start. For product-specific social content, consider displaying the feed only on relevant product pages.
Step 7: Publish the Instagram Feed with an app block (required)
Creating and saving a campaign does not automatically make the video appear on your storefront. You also need to add the ReelPik app block to your homepage.
To add the app block:
-
Go to the Publish Widget section.
-
Click Add app block.
-
Select Homepage, Collection page, or Product page from the supported page options.
-
Click Continue.
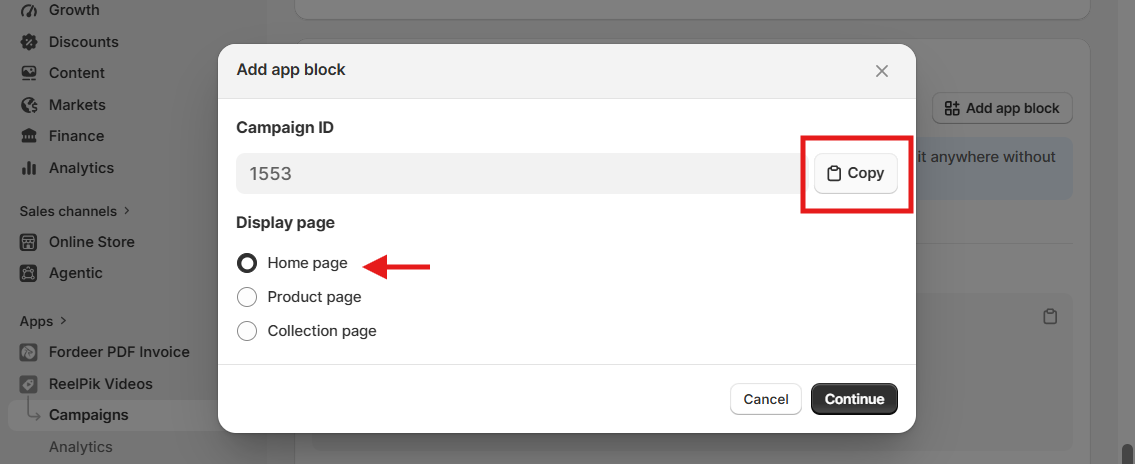
You will then be redirected to the Shopify Theme Editor.
In the Theme Editor:
-
Customize the position and appearance of the ReelPik app block.
-
Make sure the block is enabled.
-
Click Save.
You can then preview your storefront to check how your Instagram feed campaign appears on the homepage.
Note: If you need more control over where your Instagram feed appears, ReelPik also provides Snippet code.
Best Practices for Instagram feed campaigns
1. Choose the right content source
Use User account when you want a consistent feed of your own Instagram content.
Use Account mention or Hashtag when you want to showcase content created by your community or other Instagram users.
Always make sure you have permission to use the content you display.
2. Choose the right media type
If your Instagram strategy focuses mainly on Reels, select Video.
If you mainly publish photos, select Image.
Choose Video & image when you want customers to see a broader mix of your Instagram content.
3. Use sorting strategically
Different sorting options can serve different goals.
For example, sorting by Likes, Comments, or Views can help surface engaging content, while Date can be useful when you want to prioritize recent Instagram content.
4. Preview your feed
Before publishing, use Preview feed and check that:
-
The correct Instagram content is being synced.
-
The selected media type is correct.
-
The feed contains an appropriate number of posts.
-
The sorting matches your intended result.
-
You have permission to display the content.
After publishing, also preview the actual Shopify storefront on both desktop and mobile.
We value your feedback — it helps us continuously improve ReelPik and provide you with a better experience.
🖥️ Demo store: Check out here with password: 1
👉 Chat with us: Share your feedback directly with our team.
👉 Email us: hi@reelpik.com
👉 Explore more apps: Discover more Fordeer apps.
👉 Join our community: Join ForDeer Community to get the latest updates, tips, and special deals.
🕐 Working hours: 8:30 AM – 5:00 PM (UTC+7), Monday–Friday.
We typically reply to live chats within minutes and emails within a few hours.
Need help? Feel free to reach out anytime via live chat or email!